
To remove a dummy door handle, loosen the set screw and gently pull it off. Dummy door handles are non-functional handles that require no latching mechanism and are commonly used on closet or pantry doors.
Removing them is a simple task that can be done with a few basic tools. Dummy door handles are easy to remove and require no special skills. However, care should be taken when handling them, as they are often fragile.
In this article, we will guide you through the procedure of removing a dummy door handle.
What Is A Dummy Door Knob?
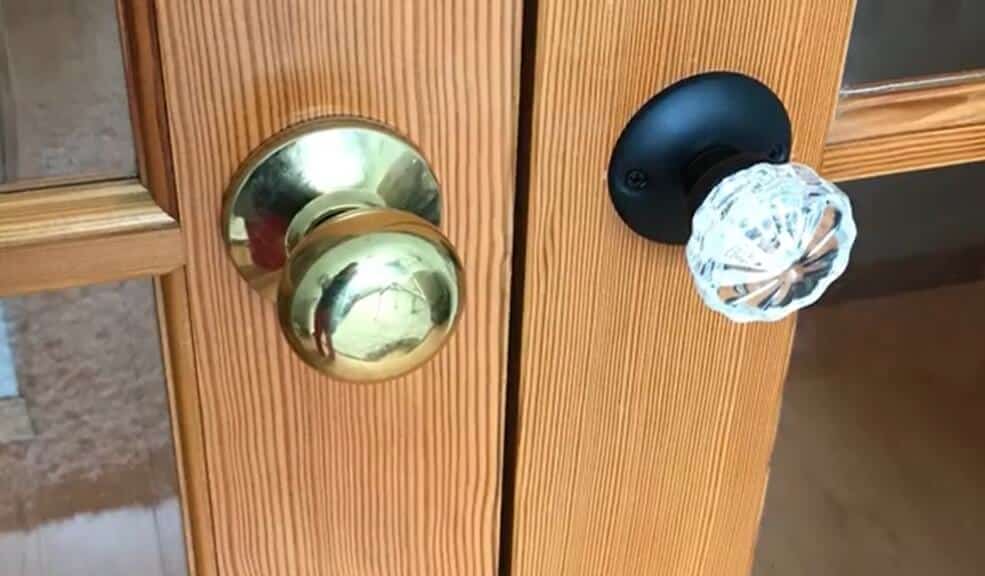
First things first, let’s learn what a dummy door knob is. A dummy door knob is nothing but a decorative knob that doesn’t turn or operate any latch mechanism.
It’s typically used on closet doors, pantry doors, or any door where a functioning knob isn’t necessary, but aesthetics are desired.
How Does A Dummy Door Knob Work?
Knowing how a dummy door knob works will help you remove it easily.
A dummy door knob doesn’t have any mechanical functionality like a regular door knob. It’s essentially a decorative piece that is mounted to the surface of the door, typically on one side only.
It doesn’t turn or operate any latch mechanism. Instead, it’s used purely for aesthetic purposes, providing symmetry and balance to the door’s appearance.
Tools & Materials Needed
Removing a dummy door handle is a simple procedure. But not having the proper tools and equipment can make the job much more difficult.
Below are the tools and materials you will need:
- Phillips screwdriver: The screwdriver with a star-shaped end is essential for removing the screws that hold the dummy door handle in place.
- Drill with drill bits: Sometimes, screws are stubborn and difficult to remove. A drill can make the job easier by drilling a hole in the screw head and allowing it to come out.
- Work gloves: More than just a fashion statement, gloves protect your hands from cuts while handling the door handle.
- Safety glasses: It’s always a good idea to wear protective glasses during a DIY project to prevent debris from entering your eyes.
- Putty knife: A putty knife helps to remove any excess caulking or adhesive residue left behind by the door handle.
- Cleaning solution and a cloth: Before installing the new door handle, it’s important to clean the door surface under the old door handle.
Using the correct tools and materials for removing a dummy door handle is critical to the success of the job. Not only does it make the job more manageable, but it also ensures that it is completed safely.
So, gather all the necessary tools beforehand before removing your dummy door handle.
Step-By-Step Guide
Removing a dummy door handle may seem complicated, but it’s actually quite easy. You don’t need to be a professional to get it done; all you need is a bit of know-how.
We’ll be discussing the step-by-step process of removing a dummy door handle along with its decorative cover plate and screws.
So, let’s dive right in!
Step 1: Identify The Type Of Dummy Door Handle You Have
Before starting to remove a dummy door handle, it’s essential to know the type of dummy door handle you have. Identifying the type will help you understand better what you need to do for the removal process.
There are different types of dummy door handles, such as:
- Surface-mounted dummy door handles: These are glued or screwed to the door.
- Mortise dummy door handles: These are installed by routing a pocket into the door’s thickness.
- Interconnected dummy door handles: These come in a set of two handles joined together by a plate.
Step 2: Remove The Decorative Cover Plate
The decorative cover plate is the first item to be removed if you’re looking to remove a dummy door handle. Here’s how:
- Insert a flathead screwdriver below the decorative cover plate’s edge and start prying it loose.
- Once the decorative cover is loose, use your fingers to carefully remove it. Ensure you’re not damaging it during the process.
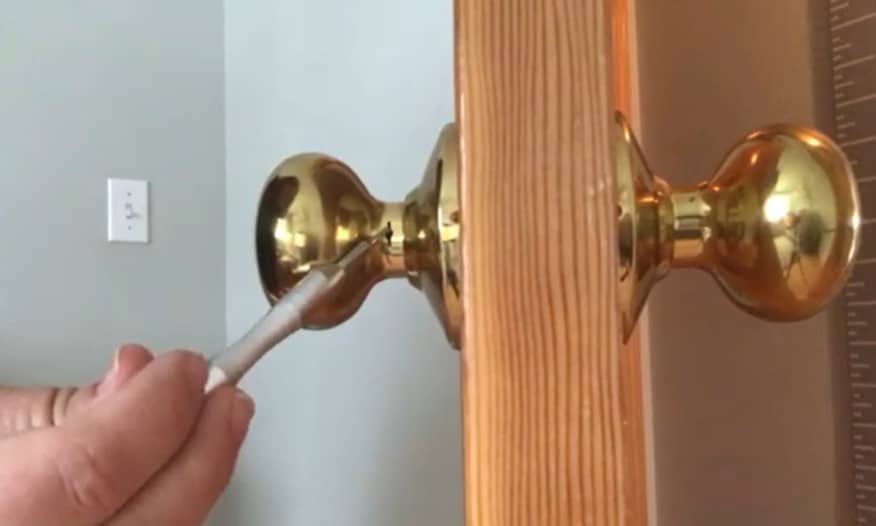
Step 3: Extract The Screws Holding The Handle
Screws hold the dummy door handle onto the door. Here are the steps to extract screws from dummy door handles:
- Locate the screws that hold the dummy door handle in place.
- Use a screwdriver to extract them. In case the screws are hidden, use a paperclip or another pointy tool to pop out the cover.
- Ensure you’re not applying too much force while removing the screws, as this could damage the handle or the door.

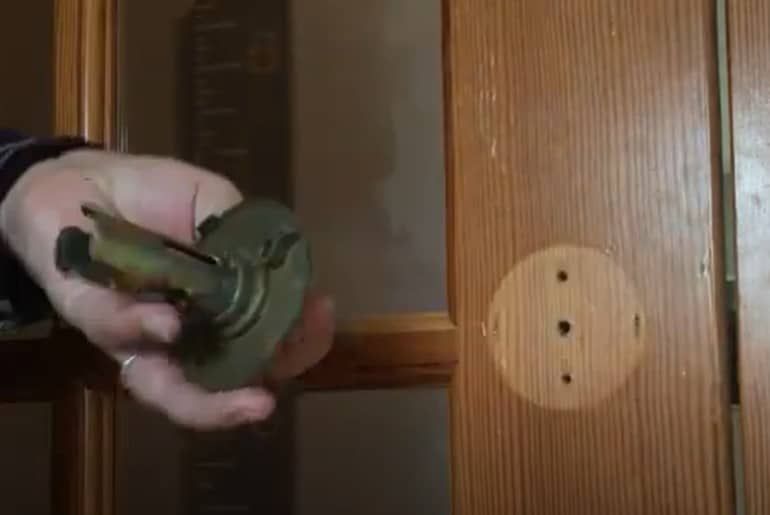
Step 4: Removing The Door Handle From The Door
Now you’re ready to remove the dummy door handle properly. Here’s what you need to do:
- Grasp the dummy door handle firmly and pull it towards you. You should now be able to pull the handle away from the door.
- If the handle is not coming out, you may need to twist it to loosen it.
Step 5: Finish Up
Now that you’ve removed the dummy door handle, it’s time to clean and store it properly. Here’s how:
- Use a soft cloth to clean the door handle and decorative cover plate. Avoid using abrasive cleaners that can scratch them.
- Store the door handle and plate in a safe, clean place. Using a cloth bag or wrapping them individually with a soft cloth will help prevent scratches or other damage accidents.
Removing a dummy door handle is a simple process, and following these steps will make it that much easier. Now you’re ready to tackle the task at hand like a pro!
How To Remove Dummy Door Handle Without Screws?
To remove a dummy door knob with hidden screws, look for a small slot or hole on the base of the knob. Insert a flathead screwdriver or similar tool into the slot and gently pry off the knob cover. This should reveal the screws underneath that hold the knob in place. Unscrew them to remove the knob.
How To Remove Dummy Door Handle From Outside?
To remove a dummy door handle from outside, look for a small slot or hole on the base of the handle. Insert a flathead screwdriver or similar tool into the slot and gently pry off the handle cover. This should reveal the screws underneath that hold the handle in place. Unscrew them to remove the handle.
How To Remove Dummy Door Handle From Inside?
To remove a dummy door handle from inside, follow the same steps as removing it from the outside. Look for the slot or hole on the base of the handle, pry off the cover, and unscrew the screws to remove the handle.
Common Issues And Troubleshooting
Removing a dummy door handle may seem simple, but it can be a daunting task for first-timers. We’ll cover common issues and troubleshooting tips you may encounter while removing a dummy door handle and help you decide when it’s time to call a professional.
Common Problems You May Encounter When Removing A Dummy Door Handle
- The door handle won’t budge, no matter how hard you pull or twist.
- The screws are stuck or stubborn to remove.
- You accidentally damage the paint or door while removing the door handle.
- There is confusion regarding which screws to remove or which parts to dismantle.
Troubleshooting Tips For Each Of These Issues
- If the door handle won’t budge, a screw or latch mechanism might be holding it in place. Look for screws on the side or under the handle to remove before attempting to twist or pull.
- If the screws are stuck or not loosening, apply penetrating oil to the screws to loosen them. Wait 10–15 minutes before attempting to turn the screws again. You may also try securing the screwdriver firmly onto the screw and tapping it with a hammer to create an impact that might loosen it.
- If you accidentally damage the paint or door while removing the door handle, consider purchasing a touch-up kit to repair the damage. Make a note of the damage if you do hire a professional.
- If you are confused about which screws to remove or parts to dismantle, look for instructions online or get a professional who knows how to remove dummy door handles.
FAQs: How To Remove Dummy Door Handle?
How Do I Remove a Dummy Door Handle?
To remove a dummy door handle, locate the mounting screws, unscrew them, and gently detach the handle from the door.
Can I Reuse a Dummy Door Handle?
Yes, you can reuse a dummy door handle. Check if the handle and screws are still in good condition before reinstalling.
What Tools Do I Need to Remove a Dummy Door Handle?
All you need is a screwdriver and pliers to remove a dummy door handle. Make sure to use the appropriate size of screwdriver.
Conclusion
Now that you have learned how to remove a dummy door handle, you can tackle this task with ease. It is important to always refer to the manufacturer’s instructions and use the right tools to avoid any damage.
Remember to take your time and follow the steps carefully, ensuring that the door handle is completely removed before proceeding with any replacements.
If you encounter any difficulties, consider seeking assistance from a professional locksmith. By removing the dummy door handle correctly, you will not only improve the overall aesthetic of your door but also increase its security and functionality.
Don’t forget to clean up any debris before using your newly secured door, and feel proud of your DIY skills.