
To put a lever door handle back together, you must first unscrew the handle, then align the parts and reattach the screws. It’s a straightforward process that just requires a little bit of focus and attention to detail.
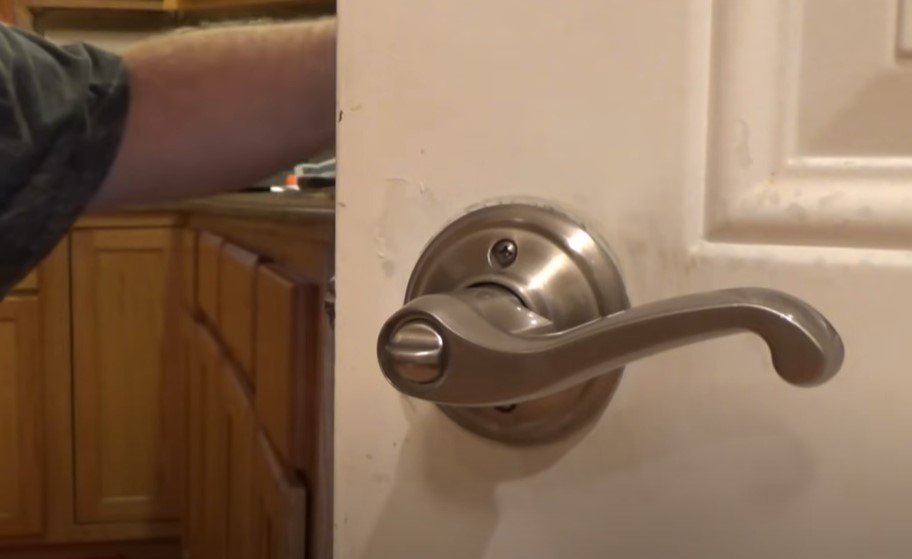
A lever door handle can add an extra touch of style to your home. Yet, a loose or broken handle can be frustrating. You may be tempted to replace the entire handle, but this can be a costly mistake.
Luckily, putting a lever door handle back together isn’t rocket science.
All you need to do is take your time and follow a few simple steps.
In this article, we’ll guide you through the process of how to put a lever door handle back together. Once you’ve done it once, you’ll see that it’s a task any DIY enthusiast can accomplish.
Tools And Materials Needed
Before diving into the process of putting a lever door handle back together, it’s important to ensure that you have all the necessary tools and materials at hand.
Here’s a brief overview of what you’ll need:
- Phillips head screwdriver: A screwdriver with a cross-shaped tip is the most common type required for removing screws that contain a cross-shaped slot in the head.
- Flathead screwdriver: A flathead screwdriver with a thin tip can be used to remove any decorative plates or coverings around the lever.
- Needle-nose pliers: These pliers are useful in holding onto screws to avoid dropping them or for reaching troublesome areas.
- Replacement parts: Depending on the specific nature of the handle’s malfunction, replacement parts like springs, screws, washers, or the inner spindle may be required. Extract the exact parts from the door handle or purchase standard replacement parts from hardware stores or online.
Putting back a lever-handled door might seem daunting, but with the required tools and materials within reach and a step-by-step approach, it becomes a simple task.
Step-By-Step Guide Of Putting A Lever Door Handle Back Together
Putting a lever door handle back together typically involves several steps. Keep in mind that the specific process may vary depending on the brand and design of the door handle, so it’s always a good idea to refer to the manufacturer’s instructions if available. Here’s a general guide:
Gather Components:
Collect all the parts of the door handle, including the lever handles, spindle, screws, rosettes, and any other components that may be part of the assembly.
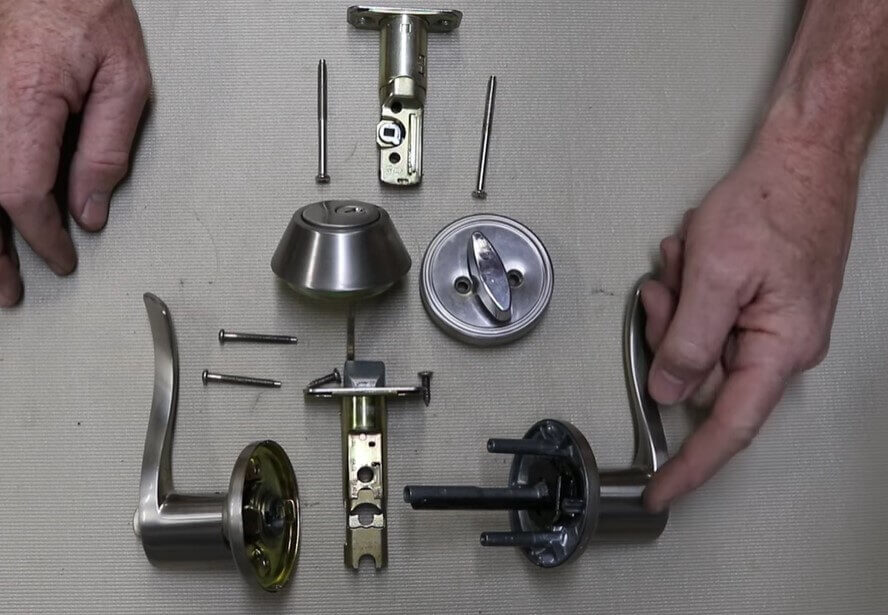
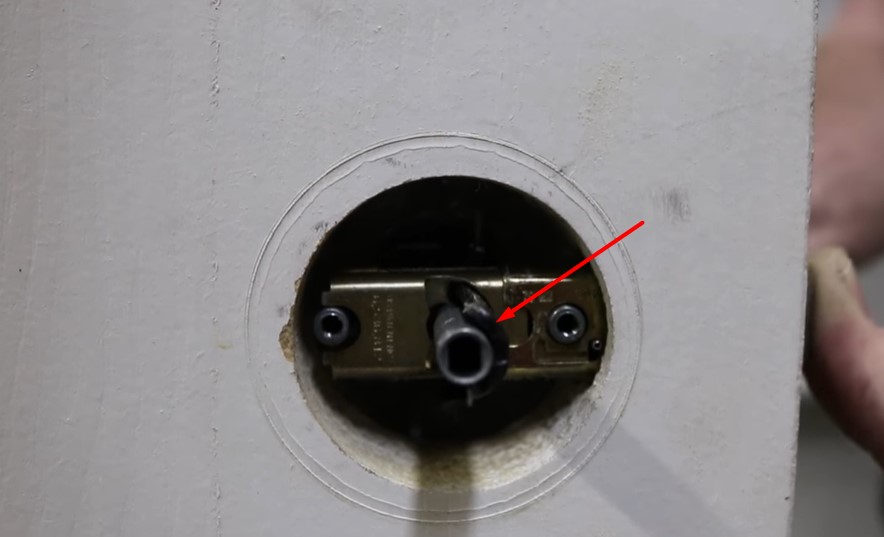
Position the Spindle:
Insert the spindle (the rod that connects the two lever handles) through the latch mechanism in the door. Make sure it is properly aligned with the holes on both sides.
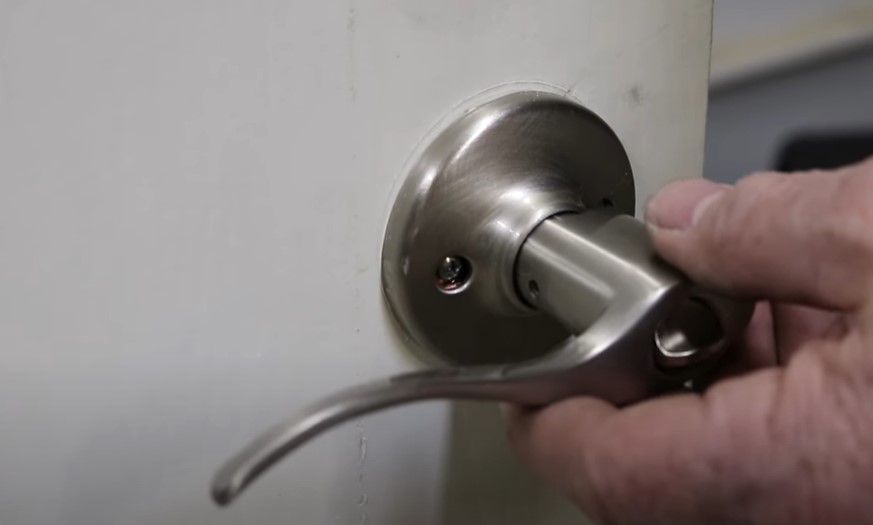
Attach the Inside Lever:
If the door handle has an inside and outside lever, start with the inside lever. Slide it onto the spindle, ensuring that any set screws or locking mechanisms are properly aligned with the holes on the spindle. Tighten any set screws using an Allen wrench if necessary.
Attach the Outside Lever:
Slide the outside lever onto the spindle from the other side of the door. Again, check for set screws or locking mechanisms and ensure proper alignment with the spindle. Tighten any set screws.
Attach Rosettes or Backplates:
If your door handle has decorative rosettes or backplates, attach them to the door on both sides. Secure them in place using the provided screws.
Tighten Screws:
Ensure that all screws are tightened securely. Use a screwdriver to tighten any visible screws on the lever handles, rosettes, and other components. Be careful not to overtighten, as it may damage the door handle.
Test the Operation:
Check the functionality of the door handle. Ensure that the levers turn smoothly and that the latch engages and disengages properly. If there are any issues, double-check the alignment of components and make adjustments as needed.
Apply Lubricant (Optional):
If desired, you can apply a small amount of lubricant to moving parts for smoother operation. Be sure to use a lubricant suitable for door hardware.
Final Inspection:
Perform a final inspection to ensure that all components are securely in place and that the door handle functions correctly.
By following these general steps, you should be able to successfully put a lever door handle back together. If you encounter any difficulties or if the door handle is a specific model with unique instructions, refer to the manufacturer’s guidelines for detailed assistance.
How To Fix Common Issues Of A Lever Door Handle?
Fixing a lever door handle may seem like a daunting task, but it’s actually quite simple with the right instructions. In this step-by-step guide, we’ll show you how to fix common issues such as a loose handle or latch, a stuck mechanism, or misaligned screws.
Additionally, we’ll provide visual aids to clarify any steps that may be confusing. And lastly, we’ll discuss when to consider calling a professional for help.
Ready to get started? Let’s dive in!
Loose Handle Or Latch
- Start by removing the two screws that hold the handle or latch in place
- Pull the handle or latch off the door and look for any worn or damaged parts
- Replace any worn or damaged parts with new ones
- Reattach the handle or latch by screwing it back onto the door, making sure the screws are tight
Stuck Mechanism
- If the mechanism is stuck, try spraying a small amount of lubricant into the mechanism to loosen it
- Wiggle the handle to see if the mechanism is still stuck
- If the mechanism is still stuck, try tightening or adjusting the screws that hold the handle in place
- If all else fails, remove the handle and mechanism from the door and inspect for any damaged or worn parts. Replace any parts that are damaged or worn, and reassemble the handle and mechanism onto the door.
Misaligned Screws
- Start by loosening the screws that hold the handle or latch in place
- Reposition the handle or latch so that the screws are in the correct place
- Tighten the screws to secure the handle or latch in place
Visual Aids
Visual aids can be extremely helpful when it comes to fixing a lever door handle. Here are a few examples of when to use a visual aid:
- When identifying parts that need to be replaced,
- When adjusting or replacing screws
- When positioning the handle or latch correctly,
Tips For When To Call A Professional For Help
While fixing a lever door handle can be relatively easy, there are certain instances in which you may want to call a professional for help. Here are a few tips:
- If you’re unsure of how to fix the problem,
- If you don’t have the necessary tools or parts,
- If the mechanism is completely broken or damaged beyond repair.
Remember, safety always comes first. If, at any point, you feel uncomfortable or unsure of what to do, consider calling a professional.
Now that you know how to fix a lever door handle, you’ll be able to confidently tackle any issues that arise in the future. Remember to always prioritize safety, and don’t hesitate to seek professional help if needed.
How to Remove Lever Door Handle?
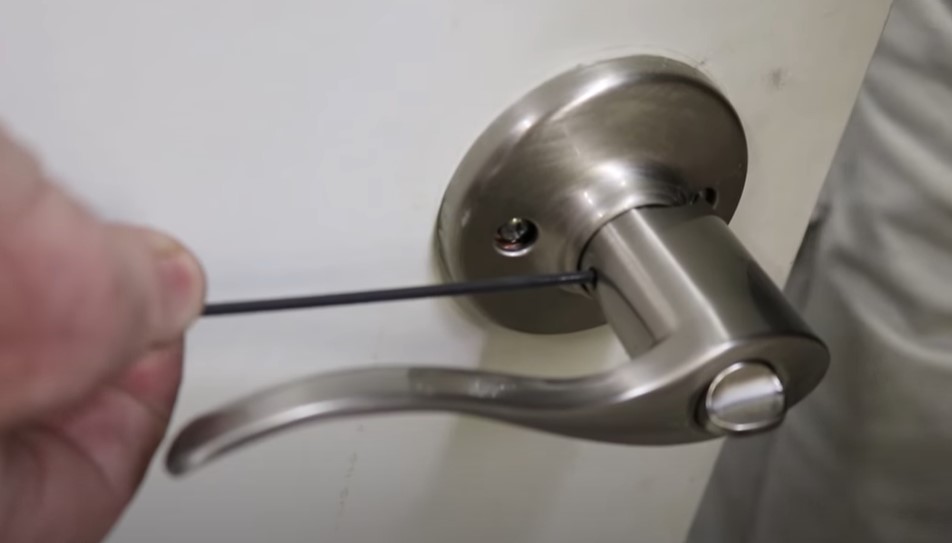
To remove a lever door handle, locate the small pinhole or slot on the handle’s shank. Insert a flathead screwdriver or an appropriate tool into the hole and press or turn it to release the handle’s locking mechanism.
Once the mechanism is disengaged, you should be able to pull the lever handles away from the door. If there’s a visible screw on the handle, loosen it using a screwdriver.
Consult the manufacturer’s instructions if needed, as removal methods may vary.
How to Remove Lever Door Handle With Hidden Screws?
To remove a lever door handle with hidden screws, look for a small slot or pinhole on the lever handle’s shank. Insert an appropriately sized Allen wrench or a similar tool into the hole. Turn the wrench counterclockwise to loosen and remove the set screw.
Once the set screw is removed, you should be able to pull the lever handles away from the door.
Keep in mind that the location of the hidden screw may vary depending on the handle’s design, so inspect the handle carefully to locate the access point for the set screw.
How to Install Kwikset Lever Door Handle?
To install a Kwikset lever door handle, follow these general steps:
Prepare the Door:
- Ensure the door is prepped with the appropriate borehole and crossbore, aligned with the specifications of the Kwikset handle.
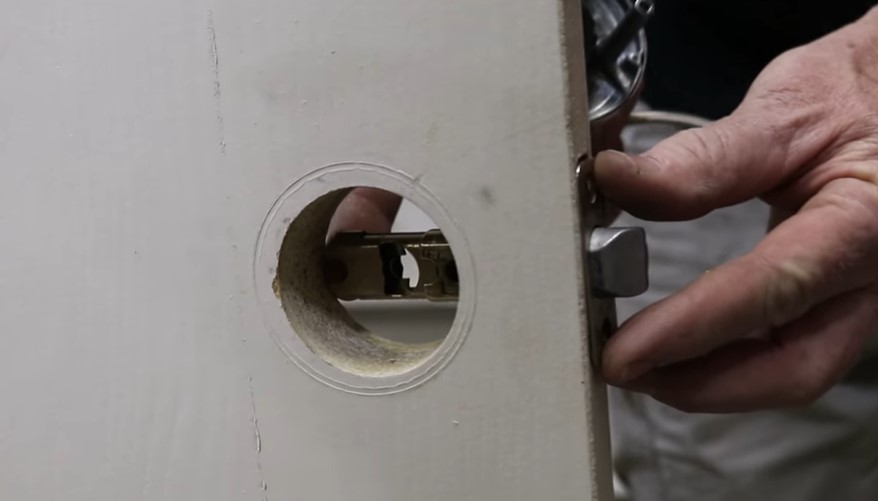
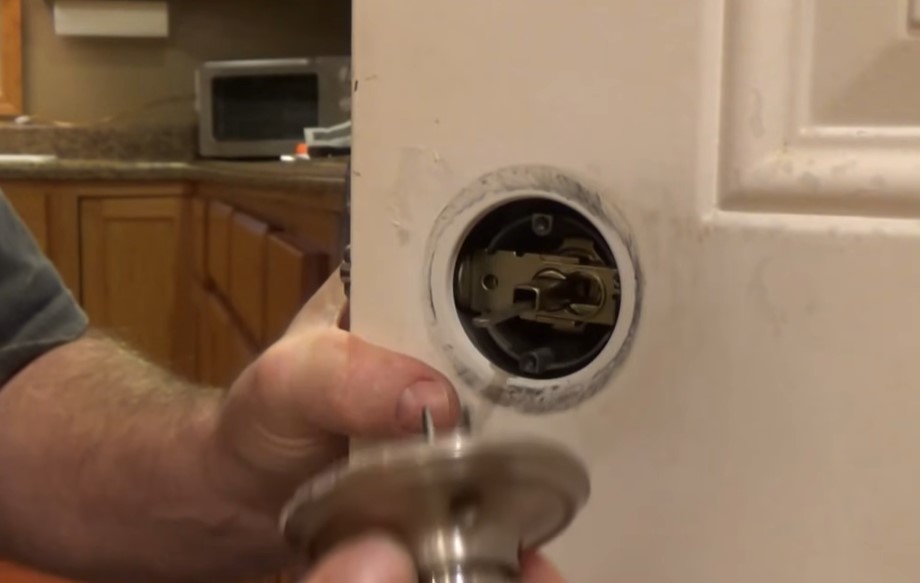
Install the Latch Mechanism:
- Insert the latch mechanism into the borehole, making sure the beveled side faces the strike plate. Secure it with the screws provided.
Attach the Exterior Lever:
- Place the exterior lever on the outside of the door, aligning the spindle with the latch mechanism. Secure it with screws, ensuring it’s level and properly aligned.
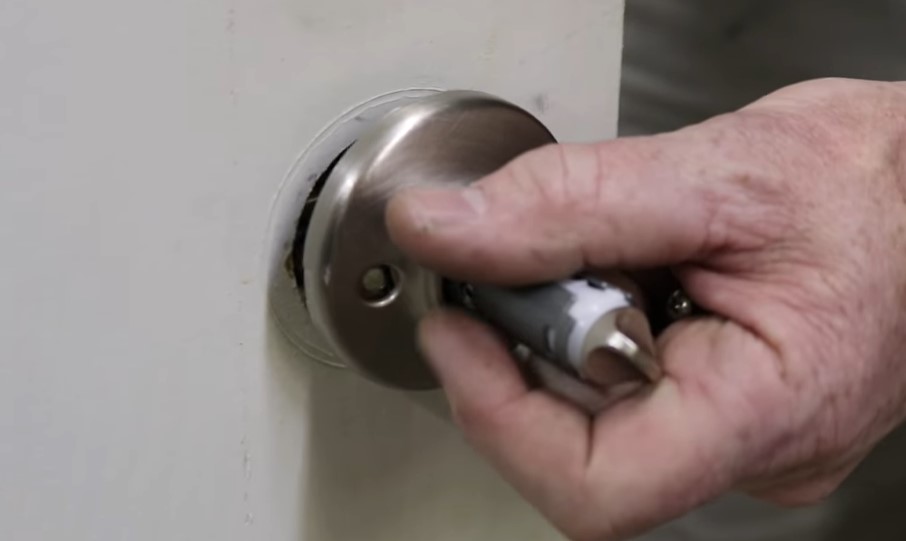
Install the Interior Lever:
- Slide the interior lever onto the spindle, aligning it with the set screw hole. Secure it by tightening the set screw using an Allen wrench.
Check Operation:
- Test the door handle’s operation by turning the lever to ensure it functions smoothly and engages with the latch properly.
Attach Strike Plate:
- Install the strike plate on the door frame, ensuring it aligns with the latch. Secure it with screws.
Adjustments (if needed):
- If the door handle is too tight or loose, adjust the set screw on the interior lever for the desired tension.
Install Screws Tightly:
- Ensure all screws are tightened securely to prevent any wobbling or instability.
Refer to the specific installation instructions provided by Kwikset for the lever handle model you have, as procedures may vary. If uncertain, consulting a professional for installation is recommended.
Replacing Lever Door Handle With Knob
To replace a lever door handle with a knob, follow these general steps:
Remove Existing Handle:
- Use a screwdriver to remove any visible screws on the lever handle. Look for a small slot or pinhole to release the handle’s locking mechanism. Pull the lever handles away from the door.
Prepare the Door:
- Ensure the door is prepped with the appropriate borehole and crossbore for the knob, aligned with the specifications of the new hardware.
Install the Latch Mechanism:
- Insert the latch mechanism into the borehole, making sure the beveled side faces the strike plate. Secure it with the screws provided.
Attach the Knob:
- Place the exterior knob on the outside of the door, aligning it with the spindle of the latch mechanism. Secure it with screws, ensuring it’s level and properly aligned.
Install the Interior Knob:
- Slide the interior knob onto the spindle, ensuring it aligns with the set screw hole. Tighten the set screw using an Allen wrench or the tool provided.
Check Operation:
- Test the door knob’s operation by turning it to ensure it functions smoothly and engages with the latch properly.
Attach Strike Plate:
- Install the strike plate on the door frame, ensuring it aligns with the latch. Secure it with screws.
Adjustments (if needed):
- If the door knob is too tight or loose, adjust the set screw on the interior knob for the desired tension.
Install Screws Tightly:
- Ensure all screws are tightened securely to prevent any wobbling or instability.
Remember to refer to the specific installation instructions provided by the knob manufacturer, as procedures may vary. If uncertain, consulting a professional for installation is recommended.

Preventing Future Issues
Lever door handles are essential features in our daily lives, facilitating the opening and closing of doors in our homes, offices, and public spaces. However, just like any other mechanical item, lever door handles are prone to wear and tear.
Regular maintenance can extend the life of your door handles and keep them looking and performing like new.
Here are some easy maintenance techniques you can try:
- Wipe down the handle regularly with a damp cloth to remove any accumulated dirt, dust, or grime that can eventually damage the finish.
- Lubricate the handle’s moving parts using a silicone spray or WD-40 to prevent squeaking, sticking, and difficulty in turning the handle.
- Tighten any loose screws that hold the handle, latch, or strike plate in place. Loose screws can cause the handle to wobble and affect its functionality and longevity.
Warning Signs To Watch Out For And How To Address Them Early
It’s essential to be aware of the warning signs that your door handle may be due for repair or replacement. Here are some telltale signs that you should watch out for:
- Squeaking or grinding noises are heard when turning the handle, indicating that the handle’s moving parts need lubrication or replacement.
- Difficulty in turning the handle, which may suggest that the door’s latch or alignment is misaligned or damaged, requiring adjustment or replacement.
- Wobbling or shaking handle, indicating that the screws that hold the lever in place are loose or the handle has worn out, requiring tightening or replacement.
If you notice any of these warning signs or any other issues with your door handle, it’s crucial to address them early, as ignoring them can result in more significant problems in the future. Get in touch with a professional locksmith or door handle repair expert if you are not confident in repairing the handle yourself.
Importance Of Routine Inspections
Routine inspections of your lever door handles can help identify issues early and prevent costly repairs or replacements down the road. Here are some benefits of regular door handle inspections:
- Early detection of wear and tear, misalignment, or other issues that can compromise the handle’s functionality and lifespan.
- Improved security by ensuring that all the locking and latching components are in good working order.
- Cost savings by avoiding expensive repairs or replacements due to neglected maintenance.
It’s a good idea to inspect your door handles at least once a year to ensure that they are in good working order and catch potential issues early.
By implementing simple maintenance techniques, watching for warning signs, and performing routine inspections, you can extend the life of your lever door handle and ensure it remains a reliable and essential part of your daily life.
FAQs: How To Put A Lever Door Handle Back Together?
How Do You Take Apart A Lever Door Handle?
To take apart a lever door handle, locate the small hole on the side of the handle and insert a paper clip or pin. Push in the paper clip and pull on the handle to release the cover plate.
How Do You Fix A Loose Lever Handle?
To fix a loose lever handle, remove the handle cover plate and tighten the screws in the handle’s mounting plate. If the mounting plate is stripped, replace it with a new one.
What Tools Do You Need To Fix A Lever Handle?
You will need a screwdriver, pliers, a paper clip or pin, and possibly a replacement mounting plate, depending on the issue you’re fixing.
How Do You Put A Lever Door Handle Back Together?
To put a lever door handle back together, reattach the mounting plate to the door, insert the spindle through the latch, attach the handle to the spindle, and reattach the cover plate. Tighten any screws and test the handle’s function.
Conclusion
Putting a lever door handle back together might seem like a daunting task, but with the right approach, it can be easily accomplished. Whether you are dealing with a loose lever, broken mechanism, or lost screws, the steps outlined in this article should help you get the job done efficiently and effectively.
Remember to start by gathering all the necessary tools and components, taking note of the existing hardware, and ensuring that everything is clean and properly lubricated. With a few simple tools and a bit of patience, you can quickly restore your door handle to full working order.
By following these simple steps, you can save yourself the cost of a professional repair or replacement and enjoy the satisfaction of a job well done.